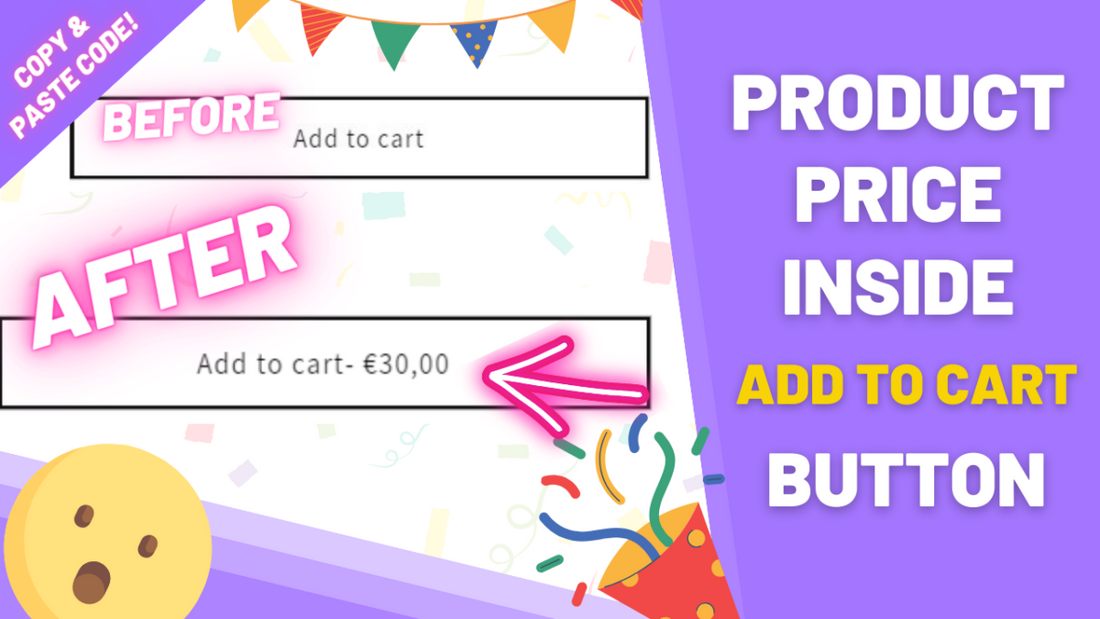
Display product's price inside add to cart button
Prices are naturally a fundamental aspect of every e-commerce store. They are, obviously, one of the key aspects of every transaction, therefore proper display to facilitate your customer's decision and overall shopping experience is a must.
In today's tutorial, we'll be exploring how you can easily display your product's price inside your Add to Cart button, positioned right beside the text. While there are numerous tutorials available on this topic, they often overlook a crucial aspect: working with variant changes.
If a product offers multiple variants with varying prices, the price displayed within the button should dynamically adjust accordingly. So, fear not! We've got you. We'll also be covering how to dynamically update the product's price based on variant changes.
Here is a live demo of the end result.
This live demo also uses our Slider Pro with Vertical Thumbnail, an improved Slider copy/paste code compatible with all Shopify's free themes.
Before diving into the tutorial, make sure you download the theme, so in case you face any issues you can easily revert back.
Step 1: editing the button code
-
From your Shopify admin, go to Online Store > Themes
-
Find the theme you want to edit, click on the 3 dots > Edit Code.
-
Find the file named:
buy-buttons.liquid.
If you don't have a file named "buy-buttons.liquid", you're using an older version of the Dawn/free theme. In this case, search for "main-product.liquid" instead.
-
Inside this file, press CTRL + F (CMD + F on Mac) to trigger the search box. Search for:
loading-
Note: depending on your theme's version the text you find may vary, but the process is still the same. -
Paste the following code above the line you found:
<span class="ezfyButtonPrice">- {{ product.selected_or_first_available_variant.price | money }}</span>
Step 2: adding javascript to handle real time changes
-
Below the "snippets" folder, click on "add a new snippet" and name it exactly:
ezfy-button-price
-
Paste the following code inside and save.
-
Find the file named:
theme.liquid
-
Inside this file, search for:
</body
Note: if you can't find a </body inside your theme.liquid file, you accidentally deleted it at some point. It's a crucial part of every theme. In this case, although I'd recommend reverting back to an unmodified version of your theme, you can paste the code at the very bottom of the file. -
Paste the following code above the line you found:
{% render 'ezfy-button-price' %}
This is it! Now, whenever a variant changes the price inside the button is updated.
Conclusion
In conclusion, when you add your product's price inside the Add to Cart button - also known as the "ATC" button - you immediately boost your store's UX even if by the slightest. Such a simple yet powerful enhancement for your Shopify store!
Making sure that your customers have ease of access to pricing information always guarantees an improved shopping experience, and the smoother this shopping experience is, the better your conversion rates will be improved, even if it's only a 0.01%. A 10% is an accumulation of lots of 0.01%s, so... keep reading our tutorials and improving your store!